
Tuning Tips
ARROW SELECTION
In the beginning, finding the “right” arrow in terms of spine and total arrow weight may feel like a daunting task. There are a few things to consider before purchasing an arrow: type of bow (limb core, speed, carbon, all wood, etc.), string material, depth of strike plate (cut to center, past center, etc.), and draw length. As mentioned before, there are many spine calculators out there and some cater to traditional bows. Often times it’s not perfect but it may get you close. For me, I still prefer a bit of experimentation to find my preferred spine.
I’ll use my current arrow to aid in this explanation. I’m currently shooting 51lbs at 26.5”. The limbs are static recurve limbs with a bamboo core. The riser is cut 1/8” past center and I’m currently using 14 strands of 8125.
Given my set up, I’m in between a .500 and .400 spine arrow shaft. If I went with the .500 spine, the arrow length would be pushing my minimal arrow length. If I used the .400, I would have to be okay with a little longer arrow. Going with the .500 would also mean that I would have to find an arrow with a heavier GPI, because I wouldn’t want too much weight upfront which may soften the spine further. If I decide to use the .400, I would want to front weight it as much as possible, given that I would want to soften the spine. Given those two scenarios, I’m currently using the .400. If I went with the .500, the broadhead would come really close to my bow hand and may even contact my riser if I over drew my bow. With the .400 I’m able to go with a heavier FOC and I prefer to hunt with front heavy carbon arrows. Keep in mind, I’m also trying to get my desired GPP which typically runs between 9.5 – 10 GPP. That’s an arrow that weighs around 485 – 510 grains. My current arrow is a 28” .400 spine. The total weight is 502 grains with 250 grains upfront.
With the popularity of traditional bowhunting, we have so many options these days. We can choose from wood, aluminum or carbon shafts. These shafts come in many different spines and GPI. We can add weight to the front or nock end of certain shafts. You can even boost the GPI by using weight tubes. The options of adapters and inserts are numerous and broadheads come in all sorts of weights these days. In addition, companies will sell single shafts of tests kits, so you don’t have to purchase an entire dozen to experiment with your rig.
BOW TUNING
Next, it’ll be time to start the tuning process. For myself, I prefer to paper tune, bare shaft tune and as a final check, I’ll shoot a bare shaft, fletched shaft and broadhead tipped shaft downrange (using all three methods is not necessary).
For paper tuning, I get my most reliable results by standing 6ft from the paper, so for me, my bow hand is about 4.5ft from the paper.
When bare shafting, I start off at about 10 yards to warm up and double check that the shaft will hit the target. Then I’ll move to 15 yards, but I won’t start reading the results until I hit the 20yd mark. For me, I prefer to have someone standing behind me. I try to watch the shaft flight in air as well as it’s impact in relation to my aiming point. The person behind me watches for the same thing to help confirm. I’ll also try to keep as much feather weight on the rear of the arrow, so I’ll strip just the feathers off with a razor blade, leaving the quills still attached to the shaft.
For a final test, I’ll shoot a bare shaft, fletched shaft and broadhead tipped shaft downrange. My goal is to get them to group at 20+ yards. If I do my job and my tuning is on, all three results will confirm.
If there’s a tuning error and my form is solid, the results will mimic each other on all three tests. For example, if I had a nock left, the paper would show a left tear (RT hand shooter). The bareshaft in flight would kick left out of the bow, slowly plane to the right and impact to the right of the intended impact point and if I shot all three arrows together, the feathered shaft might be on or slightly to the right of the X and the bare shaft and the broadhead tipped shaft would be even further to the right (Impact distances would depend on severity of issue). Please keep in mind that these tuning tips are from my experiences and those of others, but may not work for everyone when it comes down to tuning a traditional bow. Below are a list of things to try when diagnosing a tuning issue. I feel the toughest part in tuning is trying to read the results.
NOCK HIGH – The arrow nock kicks up, resulting in a lower impact.
(This one is a tough one as it’s the one that I’ve seen so many false readings.)
Nock set is too high – Move your nock set down in very small increments. Re-shoot after each small adjustment. This is where adjustable string nocks come in handy. I have a video on how to tie one type.
Nock set is too low – This can be a false reading. i.e. The arrow kicks nock low off the string, impacts shelf, then kicks nock high. Raise nock set in small increments. This is where adjustable string nocks come in handy. I have a video on how to tie one type.
Finger pressure on string – Where you add pressure on the string can affect the amount of tension on the upper or lower limb which could affect nock travel. Try to keep consistent with where and how much pressure is placed.
Hand pressure on grip – Where you add pressure on the grip can affect the tension on the upper or lower limb which could affect nock travel. Try to keep consistent with where and how much pressure is placed. i.e. I have one brand of bow that tunes better when pushing into the throat of the grip.
Nock sets – A double nock set can help, but make sure the gap is large enough so it doesn’t pinch the arrow nock at full draw. In addition, don’t make the gap too large as it becomes ineffective. i.e. I have mine set so at full draw, the top and bottom nock set just touch my arrow nock. My bows have about a 1/16” gap.
Tiller – If you have an ILF bow, you can also adjust your tiller. i.e. For myself, closer to even tiller for 3 under and a slight positive for split finger. If you’re buying a custom bow, be sure to let your bowyer know if you’re shooting spilt or 3 under.
Feather contact – Although feathers fold down, I’ve had shelf contact with larger feathers translate to a nock high (With paper tuning). i.e. For my set up, my top feather is orientated between 11 and 12 o’clock. This gives me the least amount of feather contact.
Spine – At times I’ve seen a nock high from a weak spine, especially with a high FOC arrow.
NOCK LOW – The arrow nock kicks down, resulting in a higher impact.
(In most cases that I’ve seen, this one is a little easier to read.)
Nock set is too low – Raise arrow nock in slight increments. Re-shoot after every slight adjustment. This is where adjustable string nocks come in handy. I have a video on how to tie one type.
If it’s not the nock set – Try one of the other nock high suggestions, numbers 3, 4, 5, and 6.
NOCK LEFT – The arrow nock kicks left, resulting in an impact to the right.
(This is for a right hand shooter.)
Weak arrow spine – If you have room to cut, shorten arrow. If applicable to situation, shift the weight from a heavy tip to a heavy insert. i.e. From a 200gr tip with a standard insert to a 125gr tip and 100gr insert (Depending on the standard insert weight, you may be +/- 10gr. In addition, this will only make a minimal amount of difference.) In some cases, you may need to move up in spine. If you have total arrow weight to spare, try a lighter weight tip.
Grip on bow – Double check to see that you’re not gripping the bow. Torquing the handle a little could throw your arrow right of impact point. (Goes back to having good form before tuning.)
Release on string – Be careful as to not pluck your string or collapse on the shot as it could throw your arrow right of impact point. (Goes back to having good form before tuning.)
Strike plate – You could build out your strike plate. Try and use a thicker material (I typically don’t do this, unless it’s a metal riser that’s cut way past center.)
Brace height – As a last resort, you could play with your brace. Don’t go past the bowyer’s recommended range.
Feather contact – Although feathers fold down, I’ve had strike plate contact with larger feathers translate to a nock left (With paper tuning).
NOCK RIGHT -The arrow nock kicks right, resulting in an impact to the left.
(This is for a right hand shooter)
Stiff arrow spine – You may need a longer arrow. If applicable to the situation, shift the heavy weight insert to a heavy weight tip. i.e. From a 125gr tip and 100gr insert to a 200gr tip with a standard insert (Depending on standard insert weight, you may be +/- 10gr. In addition, this will only make a minimal amount of difference.) In some cases, you may need to move down in spine. If you have total arrow weight to spare, try a heavier weight tip.
Grip on bow – Double check to see that you’re not gripping the bow. Torquing the handle a little can throw your arrow left of impact point. (Goes back to having good form before tuning.)
Release on string – Be careful as to not pluck your string or collapse on the shot as it can throw your arrow left of impact point. (Goes back to having good form before tuning.)
Strike plate – If you have a really thick strike plate, you could try a thinner one.
Brace height – As a last resort, you could play with your brace. Don’t go past the bowyer’s recommended range.
AIMING STYLES
There are so many different styles of aiming. I’ll be honest, this one will be a tough one to explain. What makes it even more complicated is that individuals could be using the same aiming style, but how they interpret and explain it may vary. My suggestion would be to pick up the Masters of Barebow DVDs. It’s the one series of videos that have helped me the most. If you’d prefer not to pick up the DVD’s here’s where I would suggest to begin.
In terms of aiming, I’d like to discuss three different concepts, “gap at the riser”, “gap at the target” and an “ingrained system”. Please understand, these are not technical terms, just something that I use to help explain aiming. I’ll start with gap at the riser. The visual gap at the riser has the same concept as pins on a compound. While holding your bow vertically at full draw, you’ll be able to see the riser in your sight picture. Let’s say you were to add pins on your riser for yardage marks, just like a compound, the largest gap between your arrow and the pin would be about your 10 yards mark. Then the gap would get small as the yardages get further. It should come to a point where your arrow can become a pin or what people refer to as their point on. Some refer to a point on as where the tip of the arrow is used like a pin. My point on is right around 50 yards. At full draw, if I place my arrow tip on the intended target, it should hit it.
The gap at the target looks a little different. This gap is visualized at the target and can be precisely measured in inches. The gap is the distance between where your arrow is pointing at full draw in comparison to the intended target. The visual gap starts off small at the close yardages then increases to a max gap (which is usually the mid-distance between 0 and your point on) and eventually decreases once again when return to your point on. For example, at 5 yards, your arrow tip may be pointing somewhere on the animal target, but at 15, it could be pointing at it’s feet. Then when you get back to 40 yards, the tip could be back on the animal. Many who use this type of gap try to get the arrow closer to their eye as it’ll keep the gaps at the target smaller or closer to the intended target. The terms, face walking, string walking, fixed crawl, etc. relate to what is called gap shooting or what I’m referring to as gap at the target. With face or string walking, the archer is changing how far the arrow sits from their eye at the varied yardages in order to see the same gap at the target. If you know your yardages and measure all your gaps, this can be a deadly system. Many top archers use some type of gap in their aiming process.
With these first two systems or visual interpretations, much will vary on your anchor and the distance between your eye and arrow. The speed of your bow will affect your gaps and the length of the arrow can affect your gaps at the target. In these aiming styles, you’re referencing either the bow’s riser or the arrow to aid in aiming. HopefulIy with the illustrations, it’ll help to visualize what’s going on and from there, you can choose what works best for you.
If you’re someone who would prefer not to reference the arrow or bow while aiming, then maybe you could use an ingrained system. This type of system could be compared to throwing a ball. With a lot of practice and repetition at varied yardages, you can learn the trajectory of your arrow flight. If you practice enough, your bow arm will naturally acquire the target. People will refer to this style as instinctive shooting. Basically, you’re picking a spot, going through your shot sequence, and with all your focus on the spot, you release when it feels right. Definitely an effective system for moving and close range shots. Although you can be proficient at father yardages, if long range shooting is your thing, I’d suggest incorporating some type of gap system.

“Gap by the Bow” Similar to compound sights, here’s what the gap may look like at the riser. In this image, I would be about 29 yards from the target.

“Gap at the Target” Here’s what the gap could look like at the target. The gap is in relation to the yellow spot and the arrow tip. The point on would be at about 47 yards.
WHERE TO BEGIN?
I would suggest to begin with finding an anchor that will align with your windage. Find a large target and start close. If you wish, you can run a straight line down the middle with a dot in the center. Take a shot then move back 5 yards and repeat till about 20. If your bow is tuned and your arrow to eye alignment is on, your arrows should be impacting near the line. At this point don’t worry about elevation. This system won’t work for everyone and some don’t like using the arrow, but for me it’s a starting point and if you can get windage down, all you’ll have to worry about is elevation, and trust me, elevation alone is a lot to worry about.
Once you’re happy with your windage, it’s time to move on to elevation. Again start close with a large bale. Place a small, bright dot in the center. At ten yards, go through your shot sequence and when you’re ready to aim, just focus heavily at the dot and release. At this time don’t worry about where it’s impacting. Repeat the process a few times at the same yardage. Then move back to about 15 yards and repeat the process. Based on where your arrows impact, think to yourself, what system could I try to get the arrow to impact the dot? Do you want to reference the arrow or riser in some fashion or would you rather just point and shoot? This is where the the personal intricacies come into play. Hopefully by understanding the visual gaps, you’ll have something to work with.
MY AIMING STYLE
For my aiming, I start with a “pre-aim”. I’ll raise my bow arm into a shooting position and I’ll use my arrow to set my windage. I don’t just use the tip of the arrow either, I use the entire length of the arrow as a reference. Once that is on, I do set a gap, but this is where it gets complicated. It’s not a dedicated gap where I’m holding off target so many inches, it’s an ingrained gap and it’s set before I even draw the bow.
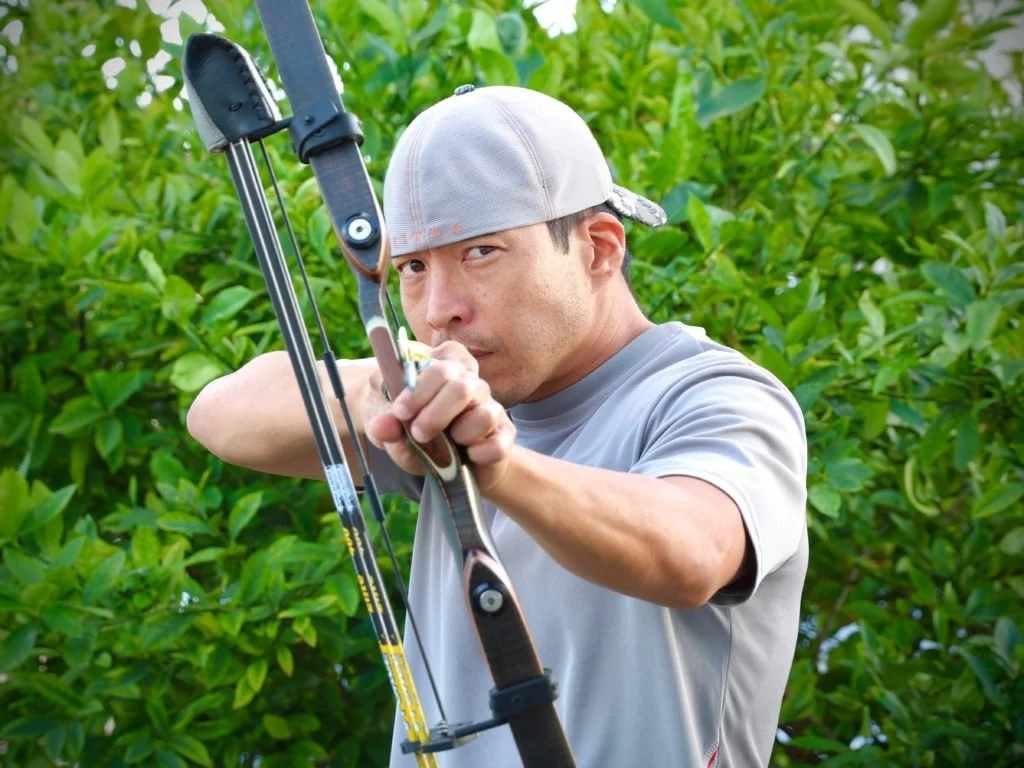
My pre-aim form
Now back to my aiming process. So again, I pre-aim by setting my windage. Next my “ingrained-gap”, then I’ll continue with my shot sequence. All the while, I’m looking at the intended spot. Once I hit my face anchor, I start to refine my aiming. This is where most of my focus turns to the spot itself. Although I see the arrow, it’s only in my peripheral vision at this time. My back is continuously engaged and I’m pointing my bowhand to the target. If I let off a good shot, the split second before I release, my focus is 100% on the spot.
My aiming style is a mix and something that I’ve consistently worked on. I’ll admit, it’s not for shots further than 30 yards, but I prefer to keep my shots close. In addition, try to find a system that lends well to shooting under pressure. Personally, I think I found something that works well for me and it only took me about 7 years. LOL!
As I mentioned before the Masters of the Barebow DVD goes into great detail about individual aiming and shooting styles. I can honestly say that if it wasn’t for those DVDs, I would be lost, especially because there are not many traditional bowhunters where I reside.
Hopefully this has given you some insight to tuning and aiming a stickbow. For me, it has been a constant evolving process and just last week I changed something in my shot sequence. Keep in mind, this is only one of many resources out there. My suggestion would be to research, experiment and find what works best for you and your application. As I always say, use what works for you!